Composite Decking Australia: How to Build a Long-Lasting Deck
Composite decking boards are a smart choice for building a durable, low-maintenance outdoor space. Whether you’re starting from scratch or replacing an old timber deck, this guide gives you the practical steps to get it done properly. We’ll explain the key terms, tools, prep work and installation method so you can build with confidence. Perfect for DIYers and tradies across Busselton and the South West.
Composite decking lingo: key terms explained
- Composite boards – Decking made from a mix of wood fibres and recycled plastic. Designed for strength and minimal upkeep.
- Joists – Timber framing that supports your decking from underneath.
- Hidden fixings – Fasteners that sit between boards, giving a clean finish with no visible screws.
- Expansion gap – Space between boards to allow for movement from heat or moisture.
- Starter clips – Small metal clips that hold your first board firmly in place.
- Capping – A hard-wearing protective layer that seals the board against UV, water and staining.
Composite decking we recommend
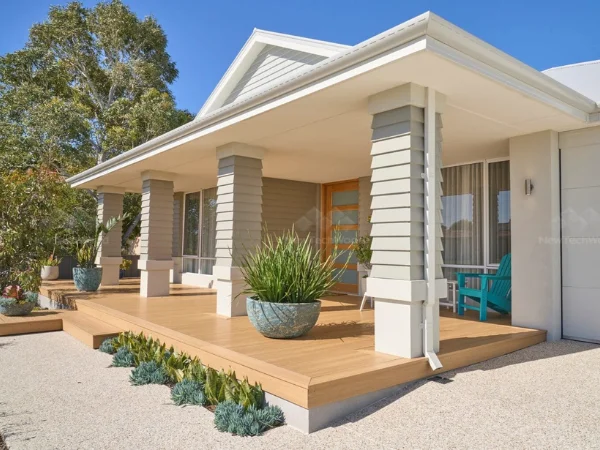
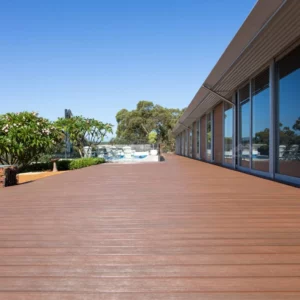
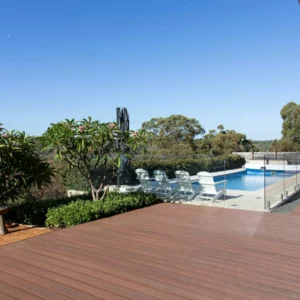
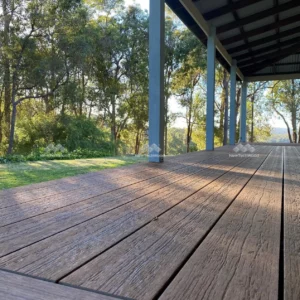
At Geographe Timber & Hardware, we back quality materials that can handle Busselton’s climate and lifestyle. When it comes to composite decking boards, we often recommend options from NewTechWood Australia. Their boards are engineered for long-term performance, with a tough wood–plastic core and a fully capped shell that resists moisture, mould and fading.
One key benefit is the low maintenance. You won’t need to paint, oil or stain these boards, just an occasional clean keeps them looking great. They’re also available in a wide range of natural timber-look colours, from soft coastal tones to darker modern greys.
Their hidden fastener system makes installation straightforward and gives you a tidy, screw-free surface. You can also choose between grooved or square-edge profiles to suit your layout and trim requirements.
If you’re planning a deck that looks sharp and lasts the distance, come and see what’s available at our timber yard. The team at Geographe Timber & Hardware can help with layout tips, fixings and everything else you’ll need to get started.

Plan your dream deck in minutes with the Deck Planner
Designing a custom deck is easier than ever with NewTechWood’s online Deck Planner. It’s a simple, step-by-step tool that helps you shape your design, choose your boards and generate a materials list, ready to bring into our team at the Geographe Timber Yard.
From concept to quote – here’s how the decking planner works:
- Shape your deck
Start with a rectangle, L-shape or upload a custom layout. - Choose your boards
Explore Avenue, Terrace or Coastal ranges all BAL-29 rated. - Design your layout
Set the direction, add breaker boards, or picture-frame the edges. - Get your item list
Download a materials list showing everything you’ll need, boards, clips, fasteners and extras. - Bring it in to our staff at the Timber Yard
Whether you use the planner or just sketch it on a notepad, bring your ideas into the Timber Yard at Geographe Timber & Hardware.
Our friendly team will help you work out exactly what you need and guide you through the options.
Special Note: We offer genuine small country-town service so if your not interested in using the design tools or calculators, thats ok! Our team can help you with that.

What you need before you start
Getting your tools and materials sorted ahead of time makes the job smoother and helps avoid costly mistakes. Composite decking boards need proper spacing and reliable fastenings.
Essentials:
- Composite decking boards
- Hidden fixing kit or composite-suitable screws
- Drill and driver bits
- Circular saw or mitre saw (for straight, clean cuts)
- Spirit level
- Tape measure
- Safety gear (gloves, glasses, ear protection)
- H3 treated pine or equivalent for joists
- Starter clips, edge trims or fascia boards (if needed)
Accessories like fasteners, screws and clips are available at Geographe Timber & Hardware. Composite boards themselves may require ordering, so it’s worth chatting to the team early.
Preparation makes the difference
Good prep work gives your deck strength, safety and a professional finish. Taking shortcuts at this stage often leads to uneven boards, warping or drainage issues later.
Key steps:
- Make sure your base is level and has good drainage
- Mark out your deck size using string lines or chalk
- Build or inspect your subframe, joists must be even and well spaced
- Allow airflow underneath to prevent moisture build-up
- Store boards flat and shaded until ready to install
- Check the expansion gap guidelines for your chosen brand
- Lay out your boards dry first to test spacing and colour flow
Bonus pro tip:
Dry-lay a few rows of boards before fixing them. This helps you line up colour variations, double-check joins, and finalise your fixing pattern before you commit.
How to install composite decking boards
Installing composite decking boards is easier than it looks, especially with a hidden fastener system.
Step-by-step:
- Fix your starter clips to the first joist.
- Slot your first board into place, making sure it’s flush and straight.
- Insert hidden clips into the groove on one side.
- Screw each clip into the joist to hold the board securely.
- Slide the next board in so it locks over the clips.
- Repeat the process, keeping spacing consistent.
- Trim board ends as needed for a neat edge.
- Add edge trims or fascia boards to finish if required.
- Double-check all fixings are flush and secure.
Bonus pro tip:
Use a spacer block or offcut to keep your expansion gaps consistent across the whole deck, especially helpful on hot days when the boards may expand slightly.
Composite decking pro tips and common mistakes
- Pre-drill if needed – Some trims and clips perform best with pilot holes.
- Leave correct spacing – Always follow manufacturer specs for movement.
- Don’t overtighten – It can crack boards or crush clips.
- Ensure airflow – Ventilation under your deck helps prevent moisture damage.
- Match your fasteners – Only use screws designed for composite.
- Clean offcuts promptly – Dust and shavings can stain if left before rain.
Finishing, drying and clean-up
A tidy finish makes all the difference. These final steps help protect your work and keep the area safe.
- Avoid heavy foot traffic for 24–48 hours (check brand guidance)
- Remove any spacers, guide strings or chalk lines
- Clean and pack away tools for future use
- Sweep the deck surface clear of sawdust and debris
- Lightly wash if needed, but skip harsh scrubbing early on
- Dispose of offcuts responsibly, composite may not be recyclable
- Make sure airflow underneath stays open and unobstructed
Visit us for composite decking and advice
Building a deck that lasts starts with reliable materials and good guidance. At Geographe Timber & Hardware, we stock the fasteners, clips and tools you need to install composite decking the right way. Our Timber Yard also carries popular styles of composite boards suited for Busselton, and our team can help you choose the right fixings and layout for your project.
For accessories and installation tools and more great deals, browse our latest catalogue.
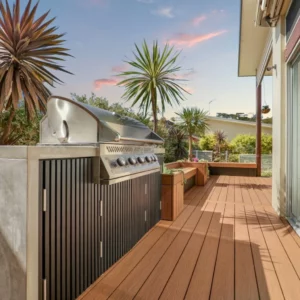
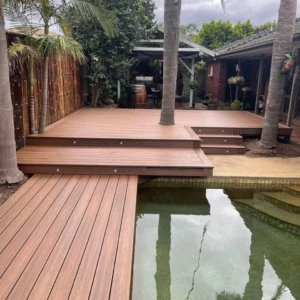
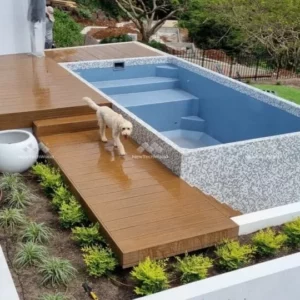
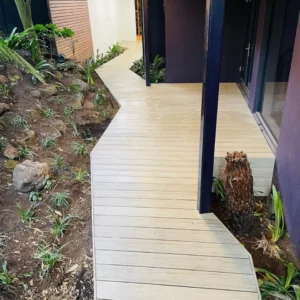
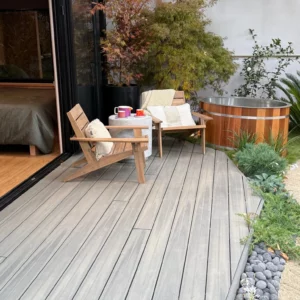
Composite Decking Inspo Gallery from NewTechWood Australia
Do not take our word for it.